Showing posts with label Tips. Show all posts

Friday, July 31, 2015

A Note on the Pigasus and Little Green Man


No doubt about it - 
These are the most popular kits in the Odd'l Rockets lineup.

The kits sell to all age groups, but some are bought by kids.
Younger flyers are attracted to the bright colors and comical design.


That is my concern - 
While they may look like an easy build, a 10 year old will need help from a parent or someone with rocketry experience.
Kids typically won't closely follow instructions. They might leave out the nose weight or have trouble gluing the large wings on the pig. If the finish isn't smooth the water slide decals won't adhere well.

If you buy one for a younger flyer, there is a reason it's rated
Skill Level 3.
Just be close by to help with the build.

Monday, April 13, 2015

Camera Tripod Launcher Tips, Part 2


To improve tripod stability -
Tie a weight to the bottom hook found on most camera tripods.
A water jug works just fine.

If you are launching in low or no winds this might not be necessary for up to D engines.

NOTE: Camera tripod launches are only safe for up to E engine power.


To use the Odd'l Rockets RAISE SPRING - 
Keep the brass tube on the lower end of the model, away from the engine hook.
Find a place where the spring will support the rocket and not bind preventing the rocket from easily sliding up the launch rod.

Thursday, April 9, 2015

Camera Tripod Launcher Tips, Part 1

If you are using the Odd'l Rockets ADEPTOR, you can launch rockets off a standard camera tripod. The Adeptor attaches onto the exposed camera screw.
No more ground level attachment of the the micro clips, no more wet grass and stained knees.

You should always think safety when using this or any launcher set-up.


There is no need to fully extend the tripod legs.
Simply extend the legs to the first "stop". This will put the blast deflector at waist level and keep the center of gravity low.


TIP: To take some of the lead wire weight off the igniter -
Tie your cable leads around the angle adjustment handle.
No more pulled out igniters!

This acts also as a "gantry". When the rocket is launched the leads fall to the side, away from the engine flame.

Monday, February 9, 2015

Cyclone Hole Punching TIP

I'm making up a batch of Cyclone kits and have to punch a ejection charge relief hole in the BT-20 upper body tubing.

You can get a clean hole using a simple 1/4" hole punch. This is how Estes punched holes in the Scout kits.

TIP: When punching the hole, be sure to stay away from the body tube seams! On the left I have penciled a line on the seam recess. Don't punch on this weakened (seam) area.
The inset picture shows the hole being punched correctly to the side of the seam.


Here's the finished hole, a perfectly round, clean punch!

Be sure to punch far enough down from the top to clear the nose cone shoulder.

Sunday, November 30, 2014

How Not To Use A Raise Spring TIP

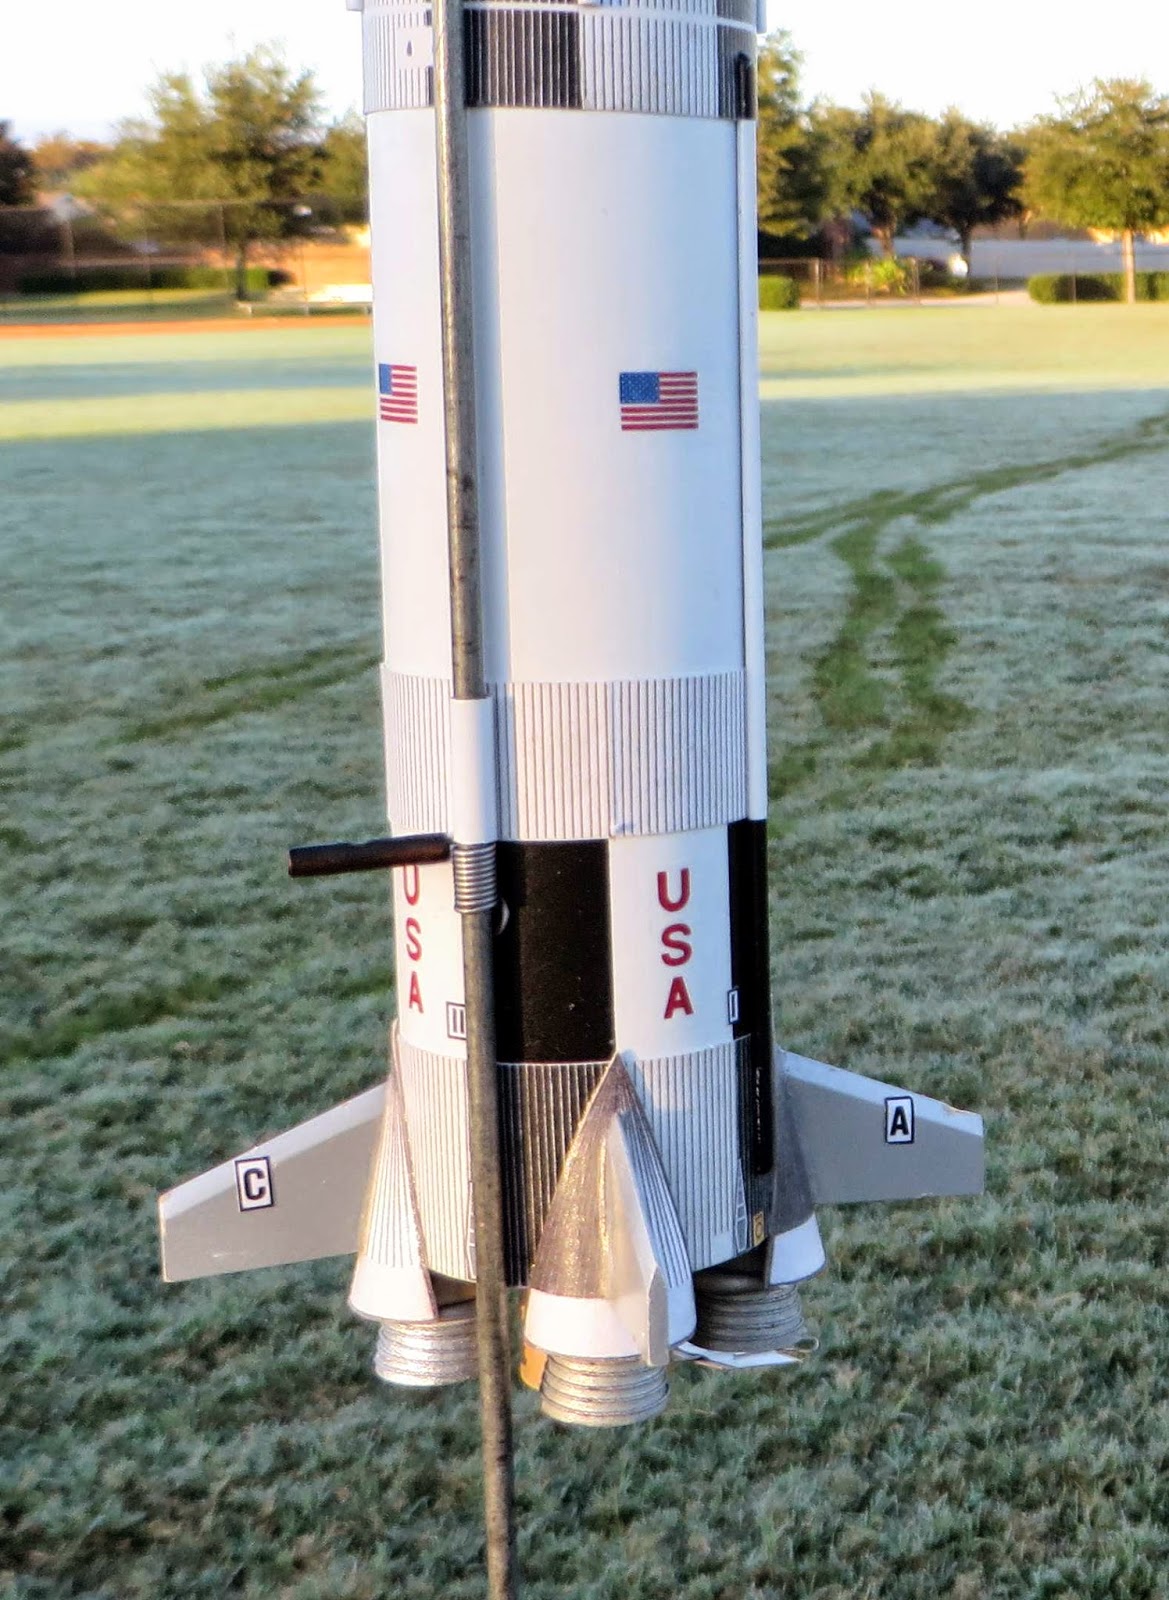
The picture to the right is how not to use a Raise Spring . . . 
Odd'l Rockets Raise Springs should go under the model - not up the side of the rocket as shown here.

DON'T SET THE RAISE SPRING UNDER A LAUNCH LUG THAT IS GLUED A FEW INCHES ABOVE THE LOW END OF THE BODY TUBE.
Your rocket could get hung up at ignition and not leave the launch rod. You could also scratch up the side of your rocket as it scrapes against the spring coils.

Set the Raise Spring UNDER the model. The spring is designed to raise the model a few inches above the blast deflector. The weight of the rocket locks the spring on the launch rod.
Keep the brass tube arm away from the nozzle flame. You could burn a hole in the brass tube!

Sunday, September 21, 2014

Little Green Man Decals

I'm just starting to get good flight reports from the Little Green Man kits.

If you've built the kit, you know I include some extra decals.
Some builders have problems with water slide decals. The extras are there just in case.

Here's some decal tips -
1. Always wet the model surface where the decal will be placed. That gives you a wet surface under the decal allowing you more time to slide and adjust it to the final position.
2. Soak until the decals easily slide off the backing paper. I'll usually soak the decal in water for about 20 seconds, remove it from the water and let it set on a paper towel until I need it.
3. Soak and apply each decal separately!
4. Slide just a small part off the backing, place that small exposed part on the model. Hold that end on the model and slide the backing off under the decal leaving just the decal on the model.
5. A wet Q-tip makes a great tool for rolling out air bubbles under the decal.
6. In the upper left corner of the decal sheet is the kit name and decal copy. Before using a large model decal, try transferring that word block onto the model.
You can get an idea of the soak time, how the decal slides off the backing and transfers onto the model. Just remember to remove that "test" decal.
It's good practice and you won't waste a kit decal!

The idea of including extras comes from FlisKits. Jim Flis will typically include an extra shroud.
Shrouds are sometimes hard to get right, the extra gives you a second chance for a better fit.

Thursday, August 7, 2014

UP! Cup Streamer Packing Tips

Most Odd Ball rockets take a few extra minutes to prep for flight.
The UP! Cup is different and takes some extra care.
The 20mm engine mount tube is over sized for a reason. A streamer is taped to and wrapped around the engine casing making a "slip" friction fit in the engine mount tube.
The instructions say to wrap the streamer around the engine casing in a  spiral, like a barber pole.
Wrapped this way, the streamer unfurls about half the time.
Here's a better way to wrap the streamer:


Tape the end of the streamer at the top of the engine at an angle.
Wrap the streamer down the engine to the bottom of the casing.


At the nozzle end, flip over the streamer tail making it bend at the bottom.
Continue wrapping, now going up to the top of the engine.


When you reach the top, turn over the streamer again and wrap a spiral down to the nozzle end again.

Continue until the streamer is fully wrapped around the engine.
The streamer shown here is a thin red plastic, 1" wide x 20" long.
That length provides a fit that keeps the engine in the mount and still allows for an easy ejection.
The back and forth spiral wrap will unfurl after it is ejected from the rocket.